

If you’re asking what size tiles are best for a small bathroom, a tile showroom is not the easiest place to find a clear answer. You’re surrounded by hundreds of formats, finishes and sizes, and a sales assistant has just told you that larger tiles will make your small bathroom look bigger. It sounds plausible, but is it actually true, or just a good way to sell you a more expensive tile? The honest answer is that it’s mostly true, but it’s also only part of the story.
Tile size is one of the most powerful design decisions you’ll make in a compact bathroom. The choice between a 300×600 mm wall tile and a 450×1200 mm one genuinely changes how the room feels. At Vortex Bathrooms, tile format is one of the most common things we work through with homeowners across the West Midlands, because getting it wrong at the planning stage is costly to fix once tiles start getting installed. This guide covers every zone, floor, wall and shower, so you can make that decision with confidence before you buy a single tile.
Why tile size changes how a small bathroom feels
The visual logic behind fewer grout lines
The principle is straightforward. Grout lines create visual interruption, showing you the breaks. Every joint on a tiled surface is a place where the eye stops, registers a line, and moves on. With 300×300 mm (30x30cm) floor tiles, you get roughly 11 tiles per square metre, each one adding its own border of grout lines to the surface. The result is a busy grid rather than a calm, open view. Switching to 600×600 mm tiles in the same area, is around 2.8 tiles per square metre, and the number of joints drops dramatically. The floor becomes a continuous surface, the eye travels farther without interruption, and the room feels larger.
This is not a trick or a marketing claim. It is basic visual psychology, and it works consistently across both floors and walls.
How your brain reads a tiled surface
On a floor, a continuous tiled plane signals open space. On walls, the grid pattern from small tiles can make a bathroom feel like it’s closing in. Eliminating that grid with a larger format, and smaller grout lines, removes the visual noise that makes a tight room feel even tighter. Tile size is not the only factor at play, but it sets the baseline for everything else you do with colour, direction and grout.
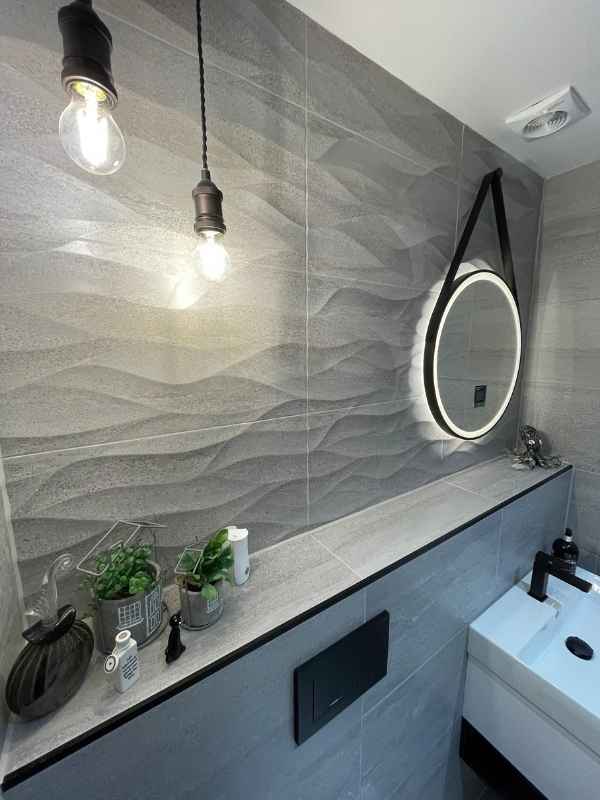
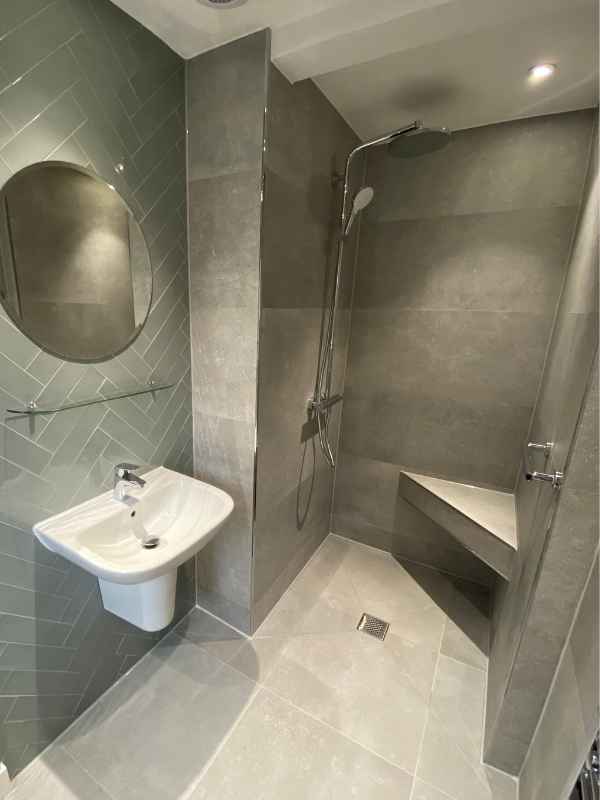
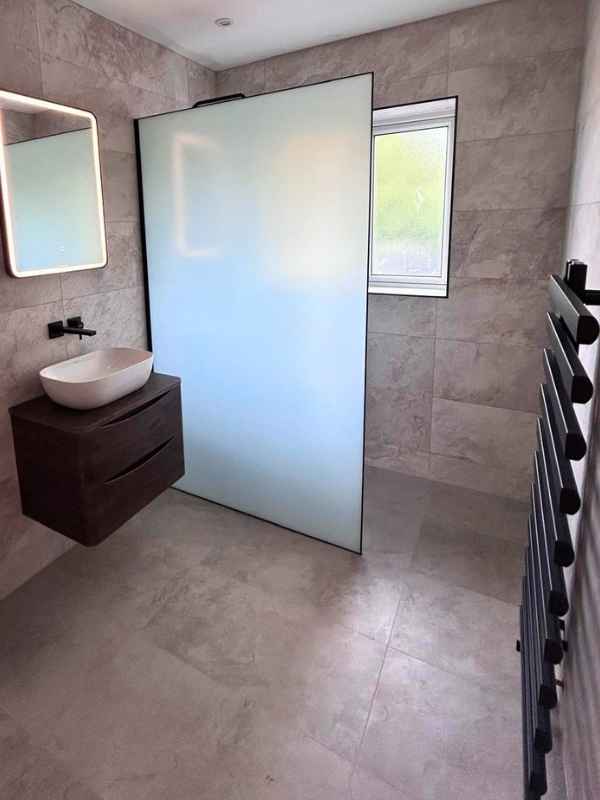
What size tiles are best for a small bathroom: floors, walls and shower trays
Floor tiles: the 400×400 mm and 300×600 mm sweet spot
For most small bathroom floors in the UK, 400×400 mm or 300×600 mm are the most practical and widely recommended formats. They are easier to cut around awkward shapes, pipework and even possibly boxing, and they are far more forgiving on floors that are not perfectly level. The 400×400 mm format typically offers better mechanical grip because of the greater number of grout lines; 300×600 mm can also perform well depending on surface finish and slip rating. For very compact spaces like a cloakroom, 300×300 mm works well, provided the grout colour is matched closely to the tile. For a small bathroom with a genuinely level floor, 600×600 mm is achievable, but it demands thorough floor preparation before a tile goes down.
A useful rule of thumb: if your floor has noticeable unevenness or an uneven substrate, it will need to levelled and fixed before any tile goes down, otherwise it can happen again
Wall tiles: why 300×600 mm is the go-to format
For small bathroom walls, 300×600 mm is the dominant UK recommendation, and with good reason. It is large enough to reduce the visual noise of a dense grid, practical enough for a competent tiler to handle efficiently, and available in an enormous range of finishes from matt stone effects to gloss metro looks. If you are working in a very tight space, 200x330mm tiles or metro tiles can make your tiling choice look purposeful rather then a bitty mis-mash of tile and grout.
Shower trays and wet room floors: the case for mosaics
On a shower floor or in the drain-fall zone of a wet room, the rules change. Very small tiles or mosaics are the easiest to install and generally offer the most grip, as the small tiles fit naturally into wet room floor former trays. The reason is drainage. A floor former drain (square or linear) requires the floor to slope inward from all four directions simultaneously. Large tiles cannot follow that compound slope without being cut into the tray, but larger tiles will create a more seamless look in the bathroom. Mosaics follow the gradient cleanly because each individual tile is small enough to sit flat on a curved surface. The extra grout lines that would be a drawback on a flat floor actually work in your favour on a shower base: they provide more grip underfoot where you need it most.

Large-format vs small tiles: the honest trade-offs
Installation complexity and substrate requirements
Large-format tiles look genuinely impressive, but they demand a skilled installer and a very flat substrate. Large format tiles require more preparation work, compared to smaller tiles. If the walls and floors are uneven, the tiles can lip, this applies to both large and small format tiles – but with small format it is easier to hide. A good fitter should always take this into account before they start. Getting your walls and floors flat and level is an important part of any good tiling project.
Cleaning, maintenance and long-term upkeep
A 300×300 mm floor has roughly four times the total joint length of a 600×600 mm floor covering the same area, a significant difference once you consider how many of those joints need cleaning. In a family bathroom that sees heavy use, more grout means more scrubbing. Fewer joints genuinely reduce the maintenance burden over the life of the bathroom, but only when the installation has been done properly on a well-prepared substrate. The summary is this: small tiles are more forgiving to install and provide better grip in wet floors; large tiles look cleaner and are easier to maintain, provided the groundwork is right.
How grout colour and tile direction amplify the effect
Matching grout to make the room feel seamless
For a small bathroom, match your grout colour as closely as possible to the tile. When grout disappears visually, the surface reads as one continuous area. When it contrasts sharply, it emphasises every single joint and draws the eye to the grid pattern you are trying to minimise. A white tile paired with dark grey grout does the opposite of making a room feel bigger: it turns your floor or wall into a visual checkerboard. Matching grout can also make dirt less obvious on floors, depending on tile colour and finish, which means the surface tends to look cleaner between deep cleans.
Laying tiles in the right direction for your room shape
Direction matters as much as size. In a narrow bathroom, lay rectangular tiles horizontally along the longest wall, with the long edge running across the room. This pulls the eye sideways and the room feels wider. In a bathroom with a low ceiling, stack wall tiles vertically to draw the eye upward and give the illusion of more height. A straight-set layout with narrow grout joints is the most effective choice for a small space. Heavily offset brick-bond patterns and herringbone add visual interest, but they also add complexity. If you use them at all in a small room, limit them to a feature strip or a shower accent rather than running them across every surface.
Slip resistance rules you can’t ignore
Understanding R-ratings for bathroom floors
The R-rating system is the practical way to evaluate grip. R9 covers dry areas, while R10 is the minimum recommendation for a main bathroom floor. R11 is the standard for shower floors and wet room floors where the surface stays wet throughout use. Some installers recommend R12 for wet rooms where the floor is continuously damp. The critical point is that tile size does not determine slip resistance. A large-format 600×600 mm porcelain tile with a matt, textured surface and an R11 rating is just as safe as a small mosaic, and in some cases easier to keep hygienically clean. Always speak to your installer or sales person to make sure the floor tiles meet your requirements for wet areas.
Seeing your tile choices in your actual room before committing
No matter how much research you do, tile decisions made from a sample card in a showroom can still surprise you when they go on walls and floors in your lighting. A tile that looks spacious and modern on a display wall can feel cold or overwhelming in a small bathroom with a north-facing window. This is precisely why at Vortex Bathrooms we produce full 3D design renders for every project, and make sure you have access to full tile samples if needed.. Homeowners across the West Midlands and Warwickshire can see exactly how a chosen tile format, colour and layout reads in their actual bathroom dimensions, under representative lighting, before a single tile is ordered or a single delivery is booked. It removes the guesswork and the costly second-guessing.
Putting it all together
So what size tiles are best for a small bathroom? The honest answer is that there is no single correct format, the right choice depends on which areas you are tiling, and how much maintenance you are prepared to take on over time. Getting grout colour and tile direction right can substantially increase the perceived size of a bathroom, turning a competent tile selection into a space that genuinely feels more open and considered.
Working out which tile size suits a small bathroom ultimately comes down to matching format to function, area by area, rather than picking the largest tile on the shelf and hoping for the best. Floor, wall and shower each have different requirements, and the decisions interact with each other in ways that are easy to overlook until grout is already dry.
If you are planning a bathroom renovation in Birmingham, Solihull, Coventry, Warwick, Leamington Spa or anywhere across the West Midlands and Warwickshire, get in touch with the team at Vortex Bathrooms. We’ll work through tile format, layout and specification with you, produce a full 3D render so you can see the result before you commit, and handle the installation from substrate to final seal, backed by a full workmanship guarantee.